|

Proverbs 31:13 She seeketh wool, and flax, and worketh willingly with her
hands.
Proverbs 31:19 She
layeth her hands to the spindle, and her hands hold the distaff.
Proverbs 31:21 She is not afraid of the snow
for her household: for all her household are clothed with scarlet.
Proverbs 31:24 She
maketh fine linen, and selleth it; and delivereth girdles unto the
merchant.
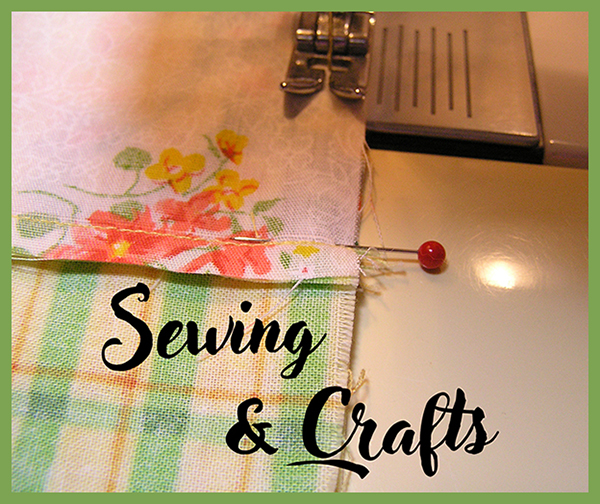
Fix It
Up
Use
It Up
1.
Teresa G. of Texas says she cuts up clothes she and her
husband have stopped wearing and makes them into clothes for kids. The
scraps she saves for making baby quilts.
2.
A string quilt-- Save the narrow scraps from cutting out
woven fabric clothes, quilts, and projects for making a string quilt. You
can use cheap muslin for the "stabilizer." Cut it into squares, rectangles,
or long strips the length of the quilt size you want. The strips may be the
most practical. Sew your first piece on in the middle or at one end. The
middle is handier since you can sew on two pieces before you have to iron.
Lay the next piece face down on the first one. Sew it on with a narrow
hem. If you started in the middle you may wish to sew a third piece on to
the other side of the first one before ironing. Be sure to iron your pieces
flat before proceeding to the next piece or pieces! The pieces will not all
be straight across, some will be diagonal. You'll have to work it out so it
comes out right, and make sure that you sew the piece on so that it will
cover the muslin all the way across from side to side! Use your imagination
in organizing the colors. You may sew pieces on with the "straight" running
a different direction than vertically IF you have your muslin cut so that
the straight is going the right direction. The nice thing about this
project is that you can work on it over a period of time as you collect
scraps from your sewing. The scraps should all be of a similar
thickness, but not necessarily exactly the same. Be sure your fabric is all
prewashed! Also, ask a sewing friend for her scraps if she doesn't want to
make a quilt like this. When you assemble the quilt you may wish to sew
strips (or squares or rectangles) of a solid color fabric between the string
strips (or squares or rectangles). I have not gotten this far yet, but I
plan to use fabric that is a similar thickness to the thickness of the
muslin with the fabric sewed to it. Use however much or little batting you
want, and backing to suit your tastes. You may quilt or tie it.
Mary VN If you have questions please email us, so that we
can fix the directions if necessary. :-)
3.
Candace writes: I am presently in the process of making a table
runner from yo-yos. I have old material and have been gathering buttons and
putting them on each yo-yo and sewing them by hand together. Looks unique
and pretty. [HMC Editor's Note: If you don't know how to
make a yo-yo, here are some basic directions. Use a plastic margarine lid
for a pattern or make your own circle pattern. The finished yo-yo will be
less than half the size of the circle you cut so figure accordingly. Thread
a needle and make a substantial knot in the end. To hem the yo-yo fold over
about a quarter of an inch, folding as you go. Sew with a running stitch.
When you get back around to the knot where you started, pull the knot and
the end with the needle. Gather the yo-yo up and press it flat with your
fingers so that the gathered hole is in the middle of the circle that you
have pressed. Make sure it is pulled tight, then tie it off well and clip
the threads. Yo-yos can be used for a number of things from quilts to
decorations. Yo-yos made in different sizes can be used to make flowers.
To make leaves to go with them take a circle cut in the color you wish and
fold it in half. Iron if you wish. Fold the the 2 corners down to the
center of the arch forming a quarter of a circle with the 2 folds running
down the middle. This is the top (unless you prefer the other side). Sew
along the arched edge as directed for the yo-yo, only when you come to the
opposite end from your knot end simply gather it without pulling the knot
at the other end. Tie it off and trim thread. This edge will have to go
under the edge of a yo-yo so that the raw edge and sewing do not show.]
Quick and Easy
1.
Elizabeth writes: For children and messes:
Sew baby bibs by cutting a terry cloth hand towel or kitchen towel in half.
Gather the cut edge, and sew on bias tape, extending the tape 6 inches past the
end. These bibs are inexpensive and large. They also conveniently double as a
wash cloth after the meal, so that one can also lighten the laundry load.
[HMC Editor's Note: Be sure to measure the baby's neck first and
add room for comfort and for the ties so that you know about how much bias
tape you will need. The kind of bias tape you will want for this project is
the double fold type. In making the the tie extensions, tuck the raw ends
in before sewing along the length of the ties so that they will be closed
properly.] 2. An
extra quick way to gather waists, sleeves, etc.: Using your
widest zigzag stitch, sew over a piece of fine string or crochet cotton just
above where you seam allowance will be. Use the string to gather the skirt,
sleeve or whatever you're gathering. Secure at ends as usual and then sew
your seam below the gathering trying to make enough seam allowance to not
sew over the string. Check your work to make sure that it is all fine
before pulling out the string. Proceed with the pattern instructions.
If the zigzag stitches show in places, pick them out carefully from the
front where they show. Save the string for future use till it starts to
look somewhat worn. You don't want it to break while you're using it.
This works easier and quicker than gathering with basting stitches, and the
thread is less likely to break when working with heavy fabric. Kite string
might also work for this. M. Van Nattan
| Hello, I
just wanted to add a little tid-bit for gathering material. Instead of using
yarn or string and zigzagging over it, I have found fishing line works best.
The thread slides very easily over it. Jayna D. |
Crafts 1.
Make a nifty decorations or place card holder for
Thanksgiving by hot gluing a walnut to one end of a large pine cone and several silk
or dried leaves to the other end to make a "turkey." If using for a place card
holder, simply put the card in between the tines on the pine cone. Be sure to
glue the things on a side that will ensure that the "turkey" will sit up
properly on it's own. :-) If using small pine cones, use a smaller nut such as
a filbert or hazelnut. An acorn might also work. 2.
Make napkin rings for yourself or as a gift. Buy metal cookie cutters in a
small size that would be suitable for a napkin ring. Paint them in matching,
contrasting, or complimentary colors, using spray paint. If using a bottled
paint that requires a paint brush you may want to give them a coat of clear
acrylic. Make napkins that match or compliment as a nice touch for a gift.
3.
Cathy A. of Louisiana writes: One decorating idea
is to take a cowboy boot, one in bad condition with a rather stiff feel to it,
and spray paint it a solid color if it is in bad condition. After this, a tall
vase can be inserted into the boot, and a western theme of grasses, tumble weed,
dried flowers etc. could be inserted....the same can be done with any stiff
shoe..only make a low arrangement, and decorate with whatever theme you have in
mind...this is just one idea of what to do...there are many. I sometimes visit
my local library for ideas....
4.
I saw a really neat idea the other day for napkin rings. You can buy the tiny
terra-cotta pots at Wal-Mart for about 30 cents. Using a glass cutter cut out
the bottom of the pots. Decorate the pot with acrylic paints, ribbon, raffia
etc. They make darling little country napkin rings. - from
Jackie R.
LINKS:
Mary's Craft Corner
- This page has a lot of crafting stuff.
Paper piecing
tutorial (Sorry about the Christmass theme, but this is a
really clear tutorial.)
A second
demonstration that might be useful, especially for the smaller more
intricate patterns.
"Quilt As You Go" Tutorials - This is a great method for small projects
such as placemats, table runners, baby quilts and so forth. By
following this method, the item is quilted when you finish the main part
and all that remains is putting on a binding! Very clever idea.
No. 1
No. 2
Strawberry
Pincushions - Or, fill with polyfiberfill and use as decor.
Super
Simple cosmetic, personal item bag
Tube Pillow Case Tutorial
- An easy way to make a pillow case from pretty or unique fabrics.
Great for gifts!
Traditional
English Hexagon Hand Piecing Tutorial:
Number 1
Number 2
Number 3
This is a nice handwork project to do in relaxation
time, while traveling, while listening to someone read or such.
Measurements
For Various Items
| MATTRESS SIZES: Standard:
Twin - 39" X 75"
Full - 54" X 75" Queen -60" X 80" King - 76" X 80"
Waterbed: Single- 48" X 84" Queen - 60" X 84" King -
72" X 84" Day Bed: 39" X 75" Crib: 27" X 52" |
TABLECLOTHS: 52" X 52" 52"
X 70" 60" X 84" 60" x 102" 60" X 120" 60" X 144"
70" Round 90" Round
|
| BED PILLOW SIZES: Standard -
20" x 26" Queen - 20" X 30" King - 20" X 36" |
NAPKINS: Dinner - 16" Square
Luncheon - 14" Square | |
COMFORTER SIZES: Twin - 69" X 90" Full - 84" X 90"
Queen- 90" X 95"
King - 106" X 98" [You may want to make these slightly larger
than this.] | DUST RUFFLES:
(Sizes include standard 14" drop) Twin - 57" X 89" Full - 96" X
110" Queen- 102" X 115" King - 120" X 115" |
| BEDSPREAD SIZES: (Sizes include
standard 21" drop) Twin - 81" X 110" Full - 96" X 110"
Queen - 102" X 115" King - 120" X 115" |
From
Basic Measurements, Jo-Ann Fabrics, 1991 -- Thanks to
Denise F. |
Submit your
suggestions, ideas, and hints! 
graphics and
background by mary vannattan
|